How to Sift Without A Sifter (15 Ways How!)
You’ve found the perfect recipe for making your favorite cookies, and you’re about to make the best cookies in the world. You’ve gathered all of the ingredients, and now you’re ready to get started!
But then, as soon as you start following the recipe, disaster strikes: it tells you to sift some flour.
But wait! You don’t have a sifter! What are you going to do? Can you even sift flour without one? If so, how? And if not, what are your alternatives?
The good news is that yes, there are ways to sift flour without a sifter. But don’t worry. We’ve got some tips for making it easier on yourself while still getting the results you want!
Why sift?
There are many reasons why you would want to sift your ingredients:
- To remove any lumps or clumps that may be present. This will ensure a smoother texture in your baked product.
- To aerate the ingredient, making it lighter and easier to work with. It will also help you to control the amount of that ingredient (such as flour) that goes into your recipe and ensure that you don’t over- or underdo it on ingredients, which can result in either an overly dense or crumbly baked good.
- To remove any dust, impurities, and other particles from your ingredient. This will ensure a more consistent texture in your baked product. It helps remove any foreign objects that may be present.
- To incorporate other ingredients more evenly (such as cocoa powder or spices). This will help you to ensure that the flavor of your recipe is consistent throughout. It saves you from having too much or too little of a certain ingredient in your baked goods, which can sometimes result in an inconsistent flavor profile. After sifting, all of the ingredients are evenly distributed throughout the batter or dough and allow for better rising when baking (or rising at all).
- To measure accurately. One cup of sifted flour will weigh less than one cup of unsifted flour, so if a recipe calls for sifted flour, it is important to use the right amount. It was found that 5 ounces of unsifted flour weigh 5 ounces while 1 cup of sifted flour weighs about 4 ounces.
- To make a light and airy baked good. For example, cakes and cookies made with sifted flour will be more tender and delicate than those made with unsifted flour. The process of sifting helps make the flour more aerated, which results in a more tender and delicate baked good.
- Sifting also allows you to get rid of any bits of grit or debris that may be present in your flour. In the case of flour, this is especially important if you are using whole wheat or other types of unbleached flour, which can sometimes contain small pieces of stone or other foreign objects.
Alternative methods to sifting without a sifter
1. The whisking method
A whisk is a great alternative to a sifter for several reasons.
First, it is much faster to use a whisk than it is to use a sifter.
Second, a whisk does not require any special equipment. All you need is a bowl and a whisk.
Finally, using a whisk will help to aerate your flour, which will result in lighter, fluffier baked goods.
A wire whisk is a great way to help sift out the flour.
Put all your dry ingredients into the bowl and then get a wire whisk. You then need to put the whisk into the bowl and move it around.
Just hold the whisk over the bowl of ingredients and move it back and forth to let the mesh catch any lumps.
You want to mix the flour. The whisk is going to help break up the lumps and is also going to help mix all your ingredients together.
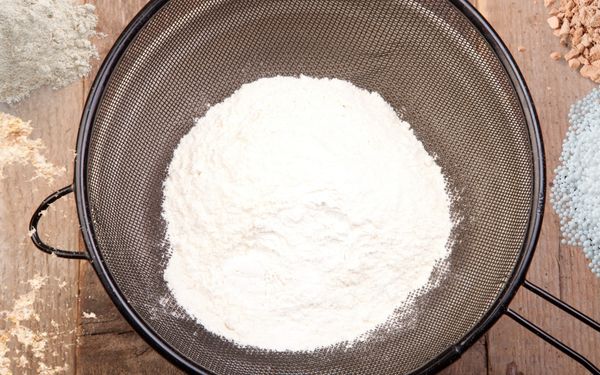
2. The strainer method
Mesh strainers can also double as a sifter if you do not have one laying around.
If you don’t have a sifter, you can use a fine-mesh strainer to sift your ingredients. Just place the strainer over a bowl and pour the ingredients into the strainer.
You can pour small amounts of your flour into the strainer and then shake it so that you can get rid of the larger lumps.
You can then press the lumps through the strainer to help break them up or you can get rid of them entirely if they are too large.
Use a spoon or spatula to press the ingredients through the strainer.
3. The fork method
If you don’t have a sifter, you can use a fork to do the job. Just hold the fork in one hand and the flour in the other.
Rub the flour through the tines of the fork until it is all sifted.
Forks can also help break up the lumps that are in the flour. This is going to take quite a bit longer to be able to break up all the lumps, but it is possible.
You can do so with smaller batches instead of putting everything into the larger bowl. You should put a small amount into a bowl to help make sure you get all the lumps.
4. The colander method
A colander is another thing that you can use to help sift out the flour.
This is going to work best for very large lumps that might be in the flour and are not going to be great if you have very small lumps that need to be sifted out.
It is a great way to get the larger lumps broken up, however, and may be all you need.
Place your dry ingredient in a colander and shake it back and forth until all of the lumps have fallen through the holes.
Using a colander to remove lumps is an effective way to ensure that your dry ingredients are lump-free.
However, the holes in a colander are large enough for small lumps to fall through, which means that the colander method is not as effective as other methods.
5. The hand method
Rub your dry ingredient between your palms until all of the lumps have broken up.
The benefit here is that you’re getting a feel for the consistency of your mixture and can adjust as needed.
The disadvantage here is that you’re not getting any extra air into your mixture, so the end result will be less fluffy. It’s also messy.
6. The electric mixer method
Place your dry ingredients in a bowl and mix on low speed until all of the lumps have been broken up.
The electric mixer method is good for breaking things up and making sure your ingredients are mixed together, but this method doesn’t remove the bits of grit or debris that might be inside your flour.
7. The food processor method
Place your dry ingredient in the food processor and pulse until it has reached a powdery consistency.
This is a great alternative to breaking up all the clumps of dry powdery ingredients.
This method is especially helpful when using ingredients like flour, sugar, or salt, because these can be hard to mix thoroughly due to their fine consistency.
8. The blender method
Place your dry ingredient in the blender and blend on low speed until it has reached a powdery consistency.
This method is quite similar to the food processor method. However, blenders are more specialized for breaking up coarser, bulkier, and wetter materials.
This method isn’t for everyone due to the inconsistency it may create and the mess involved.
9. The coffee grinder method
Place your dry ingredient in the coffee grinder and pulse until it has reached a powdery consistency.
This method can work really well, especially if you don’t plan on such a big meal. Coffee grinders work in a similar way to a food processor in that they’ll pulverize whatever that’s inside.
But similar to food processors and blenders, it doesn’t remove debris.
10. The mortar and pestle method
Place your dry ingredient in the mortar and pestle and grind until it has reached a powdery consistency.
If you’re using a mortar and pestle, be sure to use one made from stone or marble. Plastic ones won’t hold up as well under the strain of grinding ingredients.
Also, make sure they are completely dry before using them!
11. The gravity method
Simply pour your dry ingredient from one container to another (back and forth), allowing gravity to do its work by sifting out any lumps along the way.
This will allow you to see if there are any lumps in your dry ingredients.
12. The cheesecloth method
Sifting is often necessary for many recipes, that being said, you might not always have a sifter sitting around.
Cheesecloth is a great way to sift out the flour and other powdered ingredients without having to use a sifter.
To do this, you want to get a piece of cheesecloth that fits over the bowl or container that you are sifting into.
You then need to pour the flour or other powdered substances over the cheesecloth to sift out large chunks and to ensure that everything is the same consistency.
13. The coffee filter method
Coffee filters can also be used, but this is going to be a bit harder to do. You may need to make larger holes in the filter to help allow the flour to make its way through.
If that does not work, you might want to get a metal coffee filter that is going to have very fine holes and that will make it easy to sift out lumps.
Mesh or wire coffee filters are going to be better for sifting out your flour than the paper filters that you often use. These mesh filters are going to work like a sieve and are going to help you really sift out the flour.
14. The electric toothbrush method
You can also use an electric toothbrush to sift your flour and other ingredients.
It does take a bit of practice and a screen that you would put over your pans while you cook.
You put the flour or other ingredients on the screen and then use the motor of the electric toothbrush to vibrate the screen and help the lumps move through and make the mixture uniform.
15. The spoon method
Slotted spoons can also be helpful.
If you have a slotted spoon that you might use to scoop pasta or spaghetti, you can use this spoon to catch the very large lumps that might be in the flour.
When should you only use a sifter?
Using a sifter is something that is most often used with baking.
If you are making something very temperamental like macarons or angel food cake, a sifter is going to give you the best results and the smoothest flour possible.
What happens if you don’t sift flour?
If you don’t sift flour, the end result will be a denser, tougher baked good.
This is because you are not allowing the flour to aerate, which would make it more tender.
In addition, sifting flour helps remove any bits of grit or debris that may be present in your flour.
This is especially important if you are using whole wheat or other types of unbleached flour, which can sometimes contain small pieces of stone or other foreign objects.
Sifting flour helps to aerate it and remove any lumps or clumps that might be present.
By sifting your flour, your meal results in a lighter, fluffier final product.
There are several ways to sift flour without using a traditional sifter. You can use a mesh strainer, cheesecloth, coffee filter, or even just your fingers.
Whichever method you choose, make sure that the flour is fully aerated before adding it to your recipe.
Other interesting articles: