Yes, a Blender Can Grind Meat (Safety Do’s and Safety Don’ts)
If you’ve ever wondered about this, or if you’ve ever tried it and wondered whether it’s safe, then this article is for you!
We’ll go over some safety do’s and don’ts so that you don’t accidentally hurt yourself while making homemade ground beef in your kitchen.
Can a blender grind meat?
The answer is yes. Most Vitamix blenders have motors with more than 2 peak horsepower. This equates to an impressive 1,400 watts. This means that it is fully capable of shredding through any type of meat you put in. The blades shouldn’t have any issues with this job. However, there are certain things you can and can’t do when grinding meat.
Let’s get into the meat of this.
Is it safe to grind meat in a blender?
Grinding meat in a blender can be a convenient way to prepare ground meat, but it is important to use caution and follow proper safety guidelines to avoid any potential hazards.
One of the main concerns with using a blender to grind meat is the risk of overheating the blender motor.
When grinding meat in a blender, the blender motor has to work harder than when blending liquids or soft foods, which can cause it to overheat if used for an extended period of time.
This can damage the blender and potentially cause a fire or other hazards.
Additionally, if the meat is not chilled before grinding, it can release juices that can get trapped in the blender blades or cause the blender to jam. This can be difficult to clean and potentially harbor harmful bacteria.
Safety do’s and don’ts when grinding meat in a blender
Safety do’s
- Keep the blender and all utensils clean: Make sure that the blender and any utensils you use for grinding meat are thoroughly cleaned before and after use. This will help prevent the spread of bacteria and other contaminants.
- Chill the meat: Before grinding, chill the meat in the refrigerator for at least 30 minutes. This will make the meat firmer and easier to grind.
- Cut the meat into small pieces: Cut the meat into small, evenly sized pieces before grinding. This will make it easier to blend and reduce the risk of the blender getting jammed.
- Pulse the blender: Use the pulse function on the blender to grind the meat in short bursts, rather than running the blender continuously. This will help prevent overheating and ensure that the meat is ground evenly.
- Work in small batches: Only grind small batches of meat at a time, rather than trying to grind a large amount all at once. This will help ensure that the meat is ground evenly and reduce the risk of the blender overheating.
Safety don’ts
- Don’t overload the blender: Overloading the blender with too much meat at once can cause it to jam or overheat. Only grind small batches of meat at a time.
- Don’t run the blender continuously: Running the blender continuously for too long can cause it to overheat and potentially cause a fire. Use the pulse function to grind the meat in short bursts.
- Don’t leave the blender unattended: Always stay with the blender while it’s in use. This will allow you to monitor the grinding process and prevent any potential hazards.
- Don’t grind frozen meat: Never attempt to grind frozen meat in a blender. This can damage the blender’s blades and potentially cause injury.
Best practices when grinding meat with a Vitamix blender
The Vitamix is a powerful blender with high-performance abilities made for the serious user. Some people love it while others think it’s too expensive and overkill, likely because they aren’t familiar with using them.
The blender’s powerful blades are a great way to make healthy soups, smoothies, and more.
Funny enough, the topic of the matter was brought up to a Vitamix representative. The response was “yes and no,” said a representative from the Vitamix Corporation.
They also added, “The Vitamix is a powerful machine and can shred meat when used properly.”
But there are some things you should keep in mind to get the best results every time.
The idea that a Vitamix could be useful in a kitchen other than just pureeing soup might have seemed crazy, but now it’s what a lot of chefs use to make their meatballs, hamburgers, and sausages.
The idea of using a Vitamix to grind beef is not new at all. In fact, it’s been around for years now! And funny enough, it’s just an off-labeled skill.
Don’t wash your meat
It’s a common mistake that consumers make in the kitchen about washing their meat or chicken. Washing meat or chicken before cooking can actually lead to cross-contamination.
This is because the water that you wash your meat in will have bacteria on its surface. When those droplets of contaminated liquid hit other surfaces or foods, they’ll spread their germs around too!
According to the USDA.gov, modern food safety systems don’t require washing your meat or chicken.
If you don’t eat it, freeze it
It’s also advised that after making you ground meat, make sure you freeze it. This will help to prevent any bacteria from growing that might have been present on the meat before you ground it up!
The cold prevents bacteria from growing.
I would also recommend you to freeze in smaller portions so they’ll thaw faster when needed. Plus you don’t have to eat it all at once.
The USDA recommends freezing raw hamburger (meat and poultry) patties for no more than 4 months.
And unfortunately, if you leave raw meat in the regular fridge, you’ll only get 3-5 days before it goes bad.
Don’t grind the bones
While the Vitamix can potentially grind softer bones, it may fail after grinding harder bones.
The Vitamix is not designed to grind bones and the blades may get stuck in them, causing a mess! You may even burn out the motor and dull the blades.
Another reason why you must take out the bones is that they won’t blend well with the meat. You’ll produce a mixture of meat and bone.
You’ll also have to deal with the bones in every bite when you’re done, which can be a pain in itself!
Freshness tip while freezing
This is a low-key hack but when you store your meat in the fridge, you can add a pinch of baking soda to the stored meat.
Baking soda is a basic compound that will help to keep the meat fresh. It works by raising the pH of the meat and ultimately prevents the proteins from excessively bonding and losing water in the process.
The results show that the ground meat remains tender and juicier when taken out to thaw and cook.
The way to do this is simply to ground up the meat. Then take a small, roughly half a teaspoon amount of baking soda and mix it into the ground meat. You can now cook it, or store it in the freezer for later.
How to grind meat to make ground meat
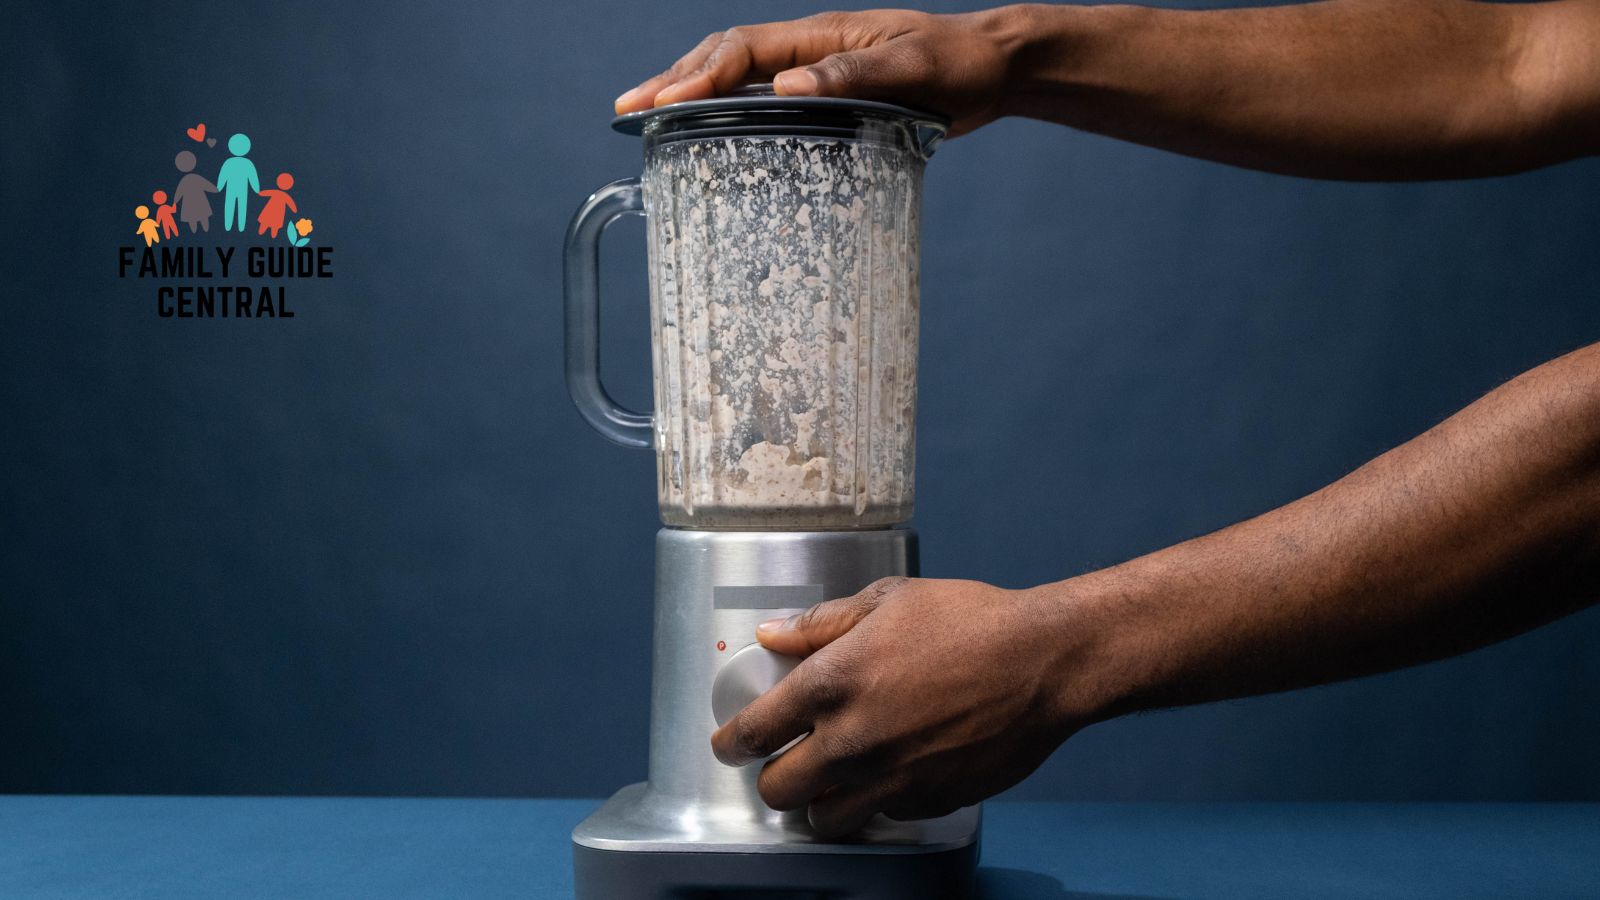
For those of us who would like to know how to grind your meat using only a blender. These are the steps for you. Be sure to not overload your batches, this could cause jams.

- Cut your meat into 1-inch cubes: Make sure the meat is still cold. Don’t leave it out and wait until it gets to room temperature. Your meat cuts don’t have to be perfect. The meat should be cut into cubes, strips, or chunks of any size and shape you like to make it easier for the blender blades when they are spinning at high speeds.
- Start with a small number of pieces: Don’t just place the entire tray of meat in the first time. You have to allow the blender to take it in one at a time. Start small and work your way up. The blender blades will have to work harder if you put in too much meat at once, and this can cause the motor to work extra hard and perhaps fail.
- Turn the speed to 1 and increase as needed: You have to also slowly increase the speed as you blend. You don’t need it to cut really fast, you just want to make sure that the meat is being cut. Start with a low speed and then increase it as needed to get your desired consistency of ground beef, sausage, or chicken. This is an important part of the blending because you have to keep an eye on the consistency of what you’re blending. It’s not just about turning on a blender and letting it go until there is nothing left to blend.
- Blend for about 10 to 15 seconds at a time: Blending for short increments at a time helps you keep an eye on the consistency of what you’re blending. If it’s too thick, blend a little faster, until it gets to the right consistency.
- Add more meat: Continue to add more meat at any time you feel that the previous meat is almost there to consistency. Remember, if you add more meat in, you will be essentially blending the previous meat even more. If its consistency is to your liking, then I would suggest just taking it out and placing it aside, and start a new batch of meat to add on. If you held off and didn’t blend the first batch too much, you can add more meat and combine the blending.
What is the difference between a Vitamix and a meat grinder
Now you’re probably wondering what makes a Vitamix and a regular meat grinder different. Aren’t they really the same thing?
The fact of the matter is that they are not the same thing.
A Vitamix is a blender that can grind meat, but it cannot be used as an actual grinder for making sausages or hamburger patties out of ground beef and other meats because its blades are blunter. It’s also got a more powerful motor to liquefy the food it takes in. The blender is specially made to turn food into liquid.
A grinder has ridge and razor-sharp blades which allow it to cut through thick foods to accomplish tasks like chopping and shredding.
Fortunately for us, a blender, if used correctly and actively monitored well, can grind meat.
Just make sure you don’t over blend it, or you will turn it into liquid.
What are the advantages and disadvantages of grinding meat in a blender?
Advantages
- Convenience: Using a blender to grind meat can be a quick and easy way to prepare ground meat at home without having to purchase a separate meat grinder.
- Texture: Depending on the blender and the amount of time spent blending, meat can be ground to a fine or coarse texture, which can be useful for different recipes and cooking methods.
- Cost: A blender is typically less expensive than a meat grinder, making it a more affordable option for those who only occasionally need to grind meat.
Disadvantages
- Safety: Grinding meat in a blender can be hazardous, especially if the blender is not designed to handle dense and tough meat. The blades can become damaged, and small bone fragments can pose a choking hazard.
- Overworking the meat: Overworking the meat can result in a rubbery texture and can also lead to the meat becoming too soft and difficult to handle. This can also affect the final texture of the dish.
- Uneven grinding: A blender may not grind the meat evenly, leaving some parts overground and others under-ground, which can affect the texture and cooking time of the meat.
- Cleaning: Cleaning a blender after grinding meat can be difficult and time-consuming, as the blades and the container can become coated with fat and meat particles.
What are the different ways of grinding meat using a blender?
- Chunking method: Cut the meat into small chunks, and then pulse the blender a few times until the desired texture is achieved. This method is good for making ground meat with a slightly coarse texture, such as for meatballs or burgers.
- Frozen meat method: Freeze the meat for a few hours until it is very cold (but not completely frozen), then cut it into chunks and pulse in the blender until it reaches the desired texture. This method helps keep the meat cold and firm, which makes it easier to grind without overworking the meat.
- Liquid method: Add a small amount of liquid, such as water or broth, to the blender before adding the meat. This helps keep the meat lubricated, preventing it from sticking to the blades and creating a smoother, more consistent grind.
What types of meat can be ground in a blender?
Most types of meat can be ground in a blender, including beef, pork, lamb, chicken, and turkey. However, it’s important to choose the right cut of meat for the job.
When selecting meat for grinding, it’s best to choose cuts that are high in fat and connective tissue, as this will help keep the meat moist and flavorful. For example, beef chuck, brisket, or short ribs are good choices for beef, while pork shoulder or belly are good options for pork.
It’s also important to choose meat that is fresh and free of any signs of spoilage, such as a sour smell, slimy texture, or discoloration. Using spoiled meat can lead to food poisoning and other health hazards.
When grinding meat in a blender, it’s important to cut the meat into small, evenly sized pieces to ensure that it blends evenly and doesn’t jam the blender blades. Additionally, it’s recommended to chill the meat in the refrigerator for at least 30 minutes before grinding to make it firmer and easier to handle.
With the right cut of meat and proper preparation, most types of meat can be ground in a blender.
What type of blender is best for grinding meat?
When it comes to grinding meat in a blender, it’s important to choose a blender that is powerful enough to handle the job without overheating or getting jammed. Here are some factors to consider when selecting a blender for grinding meat:
- Power: Look for a blender with a powerful motor of at least 500 watts or higher. This will allow the blender to handle the tough fibers and connective tissue in meat without overheating.
- Blades: Choose a blender with sharp and sturdy blades that are specifically designed for grinding meat. Some blenders come with detachable blade assemblies that are easy to clean.
- Size and capacity: Select a blender with a large enough capacity to handle the amount of meat you want to grind. A blender with a smaller jar may require you to work in smaller batches, which can be more time-consuming.
- Durability: Choose a blender that is made with high-quality materials and is built to last. Grinding meat can be tough on a blender, so it’s important to choose a model that can withstand frequent use.
- Price: Blenders can range in price from under $50 to several hundred dollars. Consider your budget and choose a blender that offers the features you need without breaking the bank.
Does a blender need special blades to grind meat?
Yes, a blender needs special blades to grind meat effectively. Most blenders come with a standard set of blades that are designed for blending smoothies and pureeing soft ingredients.
These blades are not suitable for grinding meat because they are not sharp or sturdy enough to handle the tough fibers and connective tissue in meat.
To grind meat in a blender, you need to use a specific type of blade attachment that is designed for this purpose. These blades are typically made from stainless steel and have sharp, curved edges that are specifically designed to grind meat to a fine or coarse texture.
Some blenders come with a detachable blade assembly that can be easily swapped out for a meat-grinding attachment. Alternatively, you can purchase a separate blade attachment designed specifically for grinding meat.
While it is ideal to use a special blade attachment designed specifically for grinding meat when using a blender, it is still possible to use the standard blades that come with your blender.
However, it’s important to note that the meat may come out with a different consistency and you may need to blend for a longer period of time to achieve the desired result.
Standard blender blades are not designed to handle the tough fibers and connective tissue in meat, so the resulting texture may not be as fine or even as when using a meat-grinding attachment.
If you do choose to use the standard blades, it’s recommended to work in smaller batches and to pulse the blender in short bursts to prevent overheating or damaging the blades.
How do you clean a blender after grinding meat?
Cleaning a blender after grinding meat is essential to prevent the growth of harmful bacteria and to ensure that your blender stays in good condition. Here are the steps you can follow to clean your blender after grinding meat:
- Disassemble the blender: Before cleaning, make sure to unplug the blender from the power source and disassemble it by removing the blade assembly, lid, and any other detachable parts.
- Rinse with warm water: Rinse the blender pitcher and any detachable parts with warm water to remove any remaining meat particles or debris. Be careful not to touch the blades with your fingers as they can be very sharp.
- Clean with soap and water: Add a few drops of dish soap to the blender pitcher and fill it halfway with warm water. Use a soft sponge or brush to clean the interior of the pitcher and all detachable parts. Be sure to clean around the blades, and take extra care to remove any meat particles or grease.
- Rinse again: Rinse the blender pitcher and all detachable parts thoroughly with warm water to remove any soap residue.
- Dry and reassemble: Use a clean towel to dry all the parts, paying special attention to the blades, and reassemble the blender.
- Sanitize if necessary: If you want to take extra precautions, you can sanitize your blender by filling the blender pitcher with a mixture of water and white vinegar or bleach, then running the blender on high for a few seconds. Rinse thoroughly afterward to remove any remaining sanitizer.
Other interesting articles: