How to Clean Your Traeger Grill (10 Steps to Deep Cleaning)
“A clean grill is a happy grill.” This old adage holds true for all grill enthusiasts. Keeping your Traeger grill clean not only ensures delicious and consistent results but also prolongs its lifespan.
In this guide, we’ll walk you through the process of deep cleaning your Traeger grill, so you can continue to enjoy those mouth-watering, smoky flavors for years to come.
Key takeaways
- Preheat the grill and scrape the grates before cleaning to loosen any stuck-on debris.
- Use a mild dish soap solution or a specialized grill cleaner to clean the interior and exterior surfaces of the Traeger grill.
- Remove and clean the drip tray, grease bucket, and heat baffle to maintain a clean and efficient grilling environment.
- Periodically inspect the hopper for debris and pellet quality, but regular cleaning is not necessary.
- Follow proper safety precautions, such as allowing the grill to cool before cleaning, and avoid using abrasive tools or harsh chemicals that can damage the grill.
10 steps to deep cleaning the interior of your Traeger grill
1. Gather necessary supplies
Start by gathering all the supplies you’ll need for the deep cleaning process.
This typically includes a grill brush, mild dish soap, warm water, a bucket, microfiber or soft cleaning cloths, a putty knife, a vacuum cleaner with a brush attachment, and oven cleaner (if required).
2. Safety first
Before starting the cleaning process, ensure your Traeger grill is turned off and completely cooled down.
This is important to avoid any burns or accidents during the cleaning process.
3. Remove the grates and drip tray
Take out the cooking grates and the drip tray from the grill. These are usually removable for easy cleaning.
Place them in a sink or a bucket filled with warm soapy water to soak while you clean the rest of the grill.
4. Scrape off excess residue
Use a grill brush or a putty knife to scrape off any excess food residue, grease, or ash from the interior surfaces of the grill.
Pay close attention to the grill grates, the fire pot, and the inside walls of the grill. Remove as much buildup as possible to ensure effective cleaning.
5. Vacuum the ash
Use a vacuum cleaner with a brush attachment to remove any loose ash or debris from the grill’s interior.
Be thorough and reach all corners and crevices. This step will help prepare the grill for a deeper cleaning.
6. Clean the fire pot
The fire pot is a crucial component of your Traeger grill, responsible for igniting and maintaining the fire. Clean it by scraping off any leftover ash or debris using a putty knife.
Wipe it down with a damp cloth or sponge dipped in warm soapy water.
7. Wipe down the interior surfaces
Take a soft cleaning cloth or sponge, dampen it with warm soapy water, and wipe down the interior surfaces of the grill.
Pay attention to any stubborn stains or grease buildup.
For tougher stains or carbonized residue, you may use a grill cleaner or oven cleaner (as per the manufacturer’s instructions) to break them down and facilitate easier removal.
8. Rinse and dry the grates
Once the grates and drip tray have soaked for some time, remove them from the soapy water and rinse them thoroughly with clean water.
Use a brush or sponge to scrub away any remaining residue. After rinsing, dry them completely using a clean towel or allow them to air dry before placing them back into the grill.
9. Clean the grease trap
Locate the grease trap or bucket on your Traeger grill. Empty and clean it, removing any accumulated grease or debris.
Wipe it down with a damp cloth and ensure it is completely dry before reinstalling it.
10. Reassemble and finish up
Once all the components are clean and dry, reassemble the grill by placing the grates and drip tray back into their respective positions. Double-check that everything is securely in place.
Finally, wipe down the exterior of the grill using a clean, damp cloth to remove any dirt or grease buildup.
Best tools for cleaning your Traeger grill
- Grill brush: A grill brush with sturdy bristles is essential for removing stubborn food residue and carbonized buildup from the grill grates. Look for a brush with bristles suitable for your grill’s grate material (e.g., stainless steel or cast iron).
- Putty knife: A putty knife or scraper can be useful for scraping off excess grease, ash, or debris from the interior surfaces of the grill. It helps in loosening tough residue before further cleaning.
- Soft cleaning cloths or sponges: Choose soft, non-abrasive cleaning cloths or sponges to wipe down the interior and exterior surfaces of your Traeger grill. Microfiber cloths work well as they are gentle on the surfaces while being effective at capturing dirt and grease.
- Bucket or sink: A bucket or sink is handy for soaking removable grill grates, drip trays, or other small components in warm soapy water. It allows for easier cleaning and helps in breaking down tough grease and food residues.
- Vacuum cleaner with brush attachment: A vacuum cleaner with a brush attachment is useful for removing loose ash, debris, or crumbs from the interior of the grill. The brush attachment helps reach tight spots and corners.
- Mild dish soap: Opt for a mild dish soap that is gentle on surfaces but effective in cutting through grease and grime. Mix it with warm water to create a cleaning solution for wiping down the grill surfaces.
- Grill cleaner or oven cleaner (if required): Depending on the level of buildup and tough stains, you may consider using a specialized grill cleaner or oven cleaner. Always follow the manufacturer’s instructions when using these cleaners and ensure they are suitable for your grill’s materials.
- Clean towels or paper towels: Have clean towels or paper towels on hand for drying surfaces, wiping off excess cleaning solution, or handling hot components.
- Heat-resistant gloves: Heat-resistant gloves are beneficial when handling hot components or to protect your hands during the cleaning process. They provide an extra layer of safety and prevent burns.
- Protective eyewear and apron: While not tools, wearing protective eyewear and an apron can be helpful in keeping your eyes protected from debris and preventing stains on your clothing during the cleaning process.
How often should you deep-clean your Traeger grill?
The frequency of deep cleaning your Traeger grill will depend on how frequently you use it, but as a general guideline, it is recommended to deep clean your Traeger grill at least once every three to six months.
Deep cleaning ensures the removal of stubborn grease, carbonized residue, and food particles that can accumulate over time, affecting the performance and flavor of your grilled food.
However, if you frequently cook greasy or sticky foods or notice excessive buildup, more frequent deep cleaning may be necessary.
Regular maintenance and surface cleaning after each use, such as brushing the grates and removing ash, will help prolong the time between deep cleanings.
How to make sure the grill grates are perfectly cleaned
- Preheat the grill: Before cleaning the grates, preheat your Traeger grill for about 15 minutes on high heat. The heat will help loosen any stuck-on residue, making it easier to remove.
- Brush off loose debris: Use a grill brush with stiff bristles to scrape off any loose debris or food particles from the grates. Brush in a back-and-forth motion, applying firm pressure to dislodge the buildup.
- Soak in warm soapy water: Fill a sink or bucket with warm water and add a mild dish soap. Remove the grates from the grill and place them in the soapy water to soak. This step will help to loosen stubborn grease and grime.
- Scrub the grates: After soaking for 15-30 minutes, take a grill brush or a sponge and scrub the grates thoroughly. Pay attention to both sides of the grates and ensure you scrub between the grates’ spaces to remove any residue or buildup. Apply some additional dish soap if needed.
- Rinse the grates: Once you have thoroughly scrubbed the grates, rinse them with clean water to remove any remaining soap residue. Ensure that all the soap is completely washed off to prevent any unwanted flavors during your next cook.
- Inspect for stubborn residue: After rinsing, inspect the grates for any stubborn residue or carbonized buildup. You can target those particular spots with a grill cleaner or oven cleaner (as the manufacturer suggests) if you notice any areas that need more attention. Follow the instructions on the cleaner, apply it to the affected areas, and let it sit for the recommended time.
- Re-rinse and dry: Once you have addressed any stubborn residue, rinse the grates again with clean water to remove the cleaning product. Shake off any excess water and pat the grates dry with a clean towel or allow them to air dry completely.
- Season the grates: To maintain and protect your grill grates, it’s beneficial to season them with a light coating of cooking oil. This will help prevent rust and provide a non-stick surface for your future grilling sessions. Apply a thin layer of cooking oil to the grates using a cloth or a paper towel.
What items on your Traeger need cleaning?
- Grill grates: The grill grates are where you place your food for cooking. They accumulate food particles, grease, and carbonized residue over time. Cleaning the grates helps prevent flavor transfer and ensures even heat distribution. Regular brushing and occasional deep cleaning are necessary.
- Drip tray: The drip tray catches grease and drippings during cooking. It needs regular cleaning to prevent buildup and avoid the risk of grease fires. Remove and clean the drip tray to maintain a clean and safe grilling environment.
- Fire pot: The fire pot houses the fire and ignites the pellets. Over time, ash and debris can accumulate in the fire pot, affecting ignition and temperature control. Regularly cleaning the fire pot ensures proper airflow and efficient operation.
- Pellet hopper: While not requiring frequent cleaning, the pellet hopper should be inspected periodically. Remove any debris or leftover pellets that may affect the quality of the fuel and potentially cause clogs.
- Grease management system: Traeger grills often have a grease management system that includes a grease bucket or trap. Empty and clean the grease bucket regularly to prevent overflow and maintain a hygienic grilling environment.
- Interior surfaces: The interior surfaces of the grill, including the walls, lid, and hood, can accumulate grease, smoke residue, and ash. Regular wiping and occasional deep cleaning will keep the interior clean and maintain optimal performance.
- Temperature probes: If your Traeger grill has built-in temperature probes, clean them after each use to remove any food residue or grease. Wipe them down with a damp cloth or follow the manufacturer’s instructions for cleaning.
Tips for making cleaning easier on your Traeger
- Use a grill cover: Invest in a high-quality grill cover specifically designed for your Traeger model. A cover protects your grill from dirt, dust, and weather elements when not in use, reducing the need for extensive cleaning. It also helps prevent debris from accumulating inside the grill, making maintenance easier.
- Season the grill grates: Before your first use and periodically thereafter, season the grill grates by coating them with a thin layer of cooking oil. Seasoning creates a non-stick surface, making it easier to remove food residue and prevent sticking during cooking. It also helps inhibit rust formation.
- Preheat and brush: Preheat your Traeger grill before each cooking session, allowing any residual food particles or grease to burn off. Once preheated, use a grill brush to quickly scrape the grates to remove any loosened debris. This routine maintenance will prevent excessive buildup and make deep cleaning less frequent.
- Line the drip tray: To simplify cleanup, consider lining the drip tray with aluminum foil or a disposable drip tray liner. This prevents direct contact between grease and the tray, making it easier to remove and replace the liner when necessary.
- Utilize foil or drip pans: When cooking fatty or messy foods, such as certain cuts of meat or saucy dishes, place a sheet of aluminum foil or use a disposable drip pan under the food. This helps catch drippings and prevents them from accumulating on the grates, minimizing cleanup and reducing the chances of flare-ups.
- Empty and clean the grease bucket regularly: The grease bucket or trap collects drippings during cooking. Empty and clean it regularly to avoid overflow and to maintain a clean grilling area. Consider lining the bucket with a disposable liner or placing an aluminum foil cup inside for even easier disposal.
- Wipe down the exterior: After each use, wipe down the exterior surfaces of your Traeger grill with a damp cloth. This removes any grease or residue before it has a chance to harden or build up, keeping the grill looking clean and preventing more challenging cleaning tasks down the line.
- Maintain pellet quality: Properly store your wood pellets in a dry place to prevent moisture absorption, which can lead to clumping or pellet deterioration. High-quality pellets burn efficiently, leaving behind less ash and reducing cleanup requirements.
What cleaning product works best for cleaning the Traeger
Mild dish soap
A simple solution of warm water and mild dish soap, like Dawn Ultra Platinum, is often sufficient for regular cleaning.
Mix a few drops of dish soap in warm water and use a sponge or soft cloth to wipe down the interior and exterior surfaces of the grill.
Grill cleaner
If you encounter stubborn grease or carbonized residue, you can use a specialized grill cleaner.
Look for grill cleaners like the Carbona 2-in-1 Oven Rack and Grill Cleaner that are specifically designed for removing grease and grime from grills. Follow the manufacturer’s instructions for application and safety precautions.
Oven cleaner (if recommended by the manufacturer)
Some Traeger grills may recommend using an oven cleaner for particularly stubborn stains or buildup.
If the manufacturer suggests using an oven cleaner like Weiman Oven and Grill Cleaner, carefully follow the instructions provided and ensure the cleaner is suitable for your grill’s materials.
Citrus-based cleaners
Citrus-based cleaners are known for their degreasing properties and can be effective in removing grease and residue from grills.
Look for cleaners labeled “citrus-based” and follow the instructions provided.
Vinegar and water solution
A mixture of vinegar and water can be used as a natural and cost-effective cleaning solution.
Mix equal parts of white vinegar and water in a spray bottle. Spray the solution on the surfaces, let it sit for a few minutes, and then wipe it off with a cloth or sponge.
How to prevent things from sticking to the Traeger grill
- Preheat the grill: Ensure that your Traeger grill is properly preheated before placing any food on the grates. Preheating allows the grates to reach an optimal cooking temperature and creates a non-stick surface.
- Clean and oil the grates: Clean the grill grates thoroughly before each use to remove any leftover residue or buildup. After cleaning, lightly oil the grates with a high smoke point oil such as canola, vegetable, or grapeseed oil. This helps to create a natural non-stick surface.
- Season the food: Seasoning your food with oil or marinade can create a protective layer that minimizes sticking. Brush or rub a light coat of oil on the food before placing it on the grill. This is particularly useful for delicate or lean foods that are prone to sticking, such as fish or lean meats.
- Avoid high heat flare-ups: Flare-ups caused by excessive grease or fat dripping onto the hot grates can lead to sticking. To prevent flare-ups, trim excess fat from meat, avoid overcrowding the grill, and use drip pans or aluminum foil to catch drippings.
- Use grill baskets or foil packets: For smaller or delicate foods that are prone to sticking, consider using grill baskets or wrapping them in aluminum foil packets. These methods help protect the food and prevent direct contact with the grates.
- Allow proper cooking time: Let the food cook undisturbed for a few minutes on each side before attempting to flip or move it. This allows the food to develop a sear and naturally release from the grates. Trying to move or flip the food too soon can result in sticking.
- Adjust cooking temperature: Cooking at excessively high temperatures can increase the chances of sticking. Adjust the temperature to a moderate level that is appropriate for the type of food you are grilling. This allows for even cooking and reduces the likelihood of sticking.
- Clean the grates after cooking: After grilling, clean the grates while they are still warm. Use a grill brush to remove any remaining food particles or residue, ensuring a clean surface for your next grilling session.
Do you need to remove the pellets and clean the hopper?
You do not need to remove the pellets and clean the hopper every time you use your Traeger grill.
The hopper is designed to hold and feed the wood pellets into the grill’s fire pot, providing a continuous fuel source.
However, it is essential to periodically inspect the hopper for any debris, such as dust or small pieces of wood, and remove them if necessary.
If you notice any moisture or signs of pellet deterioration, it is advisable to empty the hopper and discard any compromised pellets.
Regularly checking and maintaining the hopper’s cleanliness ensures proper pellet flow and helps prevent potential issues with fuel delivery.
How to clean the exterior of your Traeger grill
- Allow the grill to cool: Ensure that the grill has completely cooled down before attempting to clean the exterior. This prevents any risk of burns and allows for safe handling.
- Prepare a cleaning solution: Mix a mild dish soap with warm water in a bucket or sink. Use a ratio of about 1-2 tablespoons of dish soap per gallon of water.
- Dip a soft cloth or sponge: Soak a soft cloth or sponge in the soapy water solution. Wring out any excess liquid, ensuring that the cloth is damp but not dripping wet.
- Wipe the exterior surfaces: Gently wipe the exterior surfaces of the grill using the damp cloth or sponge. Pay attention to areas that may have accumulated dirt, grease, or other residues. For stubborn stains or spots, you can apply a bit of extra pressure while cleaning.
- Rinse with clean water: Once you have wiped down the exterior surfaces, rinse off the soap residue by wiping the grill with a clean, damp cloth or sponge. Make sure to remove all traces of soap to avoid any unwanted flavors or residue during future grilling sessions.
- Dry the exterior: After rinsing, use a dry cloth or towel to thoroughly dry the exterior surfaces. This helps prevent water spots and minimizes the risk of rust formation.
- Polish (optional): If desired, you can apply a stainless steel or grill-specific polish to add shine and further protect the exterior surfaces. Follow the manufacturer’s instructions for the specific polish you choose.
- Clean the control panel and knobs: Use a damp cloth or sponge to gently wipe the control panel and knobs, removing any dirt or grime. Be cautious not to saturate the control panel with water to avoid damage to the electronic components.
What would happen if you didn’t clean your Traeger grill?
If you neglect to clean your Traeger grill, several issues may arise.
First, the accumulation of grease, food particles, and residue on the grates can lead to uneven heat distribution, resulting in inconsistent cooking and potential hot spots.
The buildup can impart unpleasant flavors to your food, affecting its taste.
Neglected cleaning can also contribute to the development of rust and corrosion on the exterior surfaces, compromising the grill’s structural integrity and longevity.
Moreover, the presence of grease and debris increases the risk of grease fires, posing a safety hazard.
How often should you clean the hopper?
The hopper of your Traeger grill does not require regular cleaning.
However, it is recommended to periodically inspect the hopper for any debris or signs of pellet deterioration.
If you notice moisture, mold, or compromised pellets, it is advisable to empty the hopper and discard any affected pellets.
Routine inspection ensures proper pellet flow and helps prevent potential issues with fuel delivery.
Generally, cleaning the hopper on an as-needed basis, especially when encountering pellet quality concerns, is sufficient for maintaining the optimal performance of your Traeger grill.
How often should I clean the Traeger grill drip tray?
The frequency of cleaning the drip tray on your Traeger grill depends on the frequency and type of cooking you do.
As a general guideline, it is recommended to clean the drip tray after every few uses or when it becomes noticeably full.
Regular cleaning prevents excessive grease buildup, reduces the risk of overflow, and maintains a clean and safe grilling environment.
However, if you frequently cook fatty or greasy foods, it may be necessary to clean the drip tray more often to prevent clogging and ensure proper functioning of the grease management system.
What can I scrape my Traeger with?
When it comes to scraping your Traeger grill, it is important to use appropriate tools that do not damage the grill’s surfaces.
Traeger recommends using a non-metallic grill scraper or spatula to remove any stuck-on food or residue.
Metal scrapers or wire brushes should be avoided, as they can scratch or damage the grates or other parts of the grill.
Non-metallic scrapers made from materials like plastic or nylon are gentle enough to effectively remove debris without causing harm.
How do I clean the Traeger grill chimney?
- Safety first: Before starting any cleaning, ensure that your Traeger grill is completely cool to prevent the risk of burns.
- Remove the chimney cap: Locate the chimney cap on top of the grill and carefully remove it. The cap may be screwed on or simply lifted off, depending on your grill model.
- Inspect the chimney: take a look inside the chimney to assess the amount of buildup or creosote. Creosote is a flammable substance that can accumulate over time and needs to be removed to maintain proper ventilation.
- Scrub the chimney: use a chimney brush or a long-handled bottle brush to scrub the interior walls of the chimney. Insert the brush into the chimney and scrub in a circular motion, working your way up and down. This helps dislodge and remove any creosote or debris.
- Clean the chimney cap: while the chimney cap is removed, clean it separately. Use a brush or a cloth soaked in warm soapy water to scrub away any grease or residue. Rinse it thoroughly and allow it to dry completely before reattaching.
- Remove debris: as you scrub the chimney, debris and residue may fall into the grill’s interior. Carefully remove any loose debris or ash from the grill’s cooking chamber to prevent it from clogging the chimney or affecting future grilling sessions.
- Reattach the chimney cap: once the chimney and cap are clean and dry, securely reattach the chimney cap to its original position on top of the grill. Make sure it is properly aligned and fastened to prevent any air leaks.
Can you clean the grill grates while it’s hot?
Cleaning the grill grates while they are hot is generally not recommended, as it can be unsafe and may result in injury.
Hot grill grates can cause burns if touched directly or if cleaning tools are mishandled.
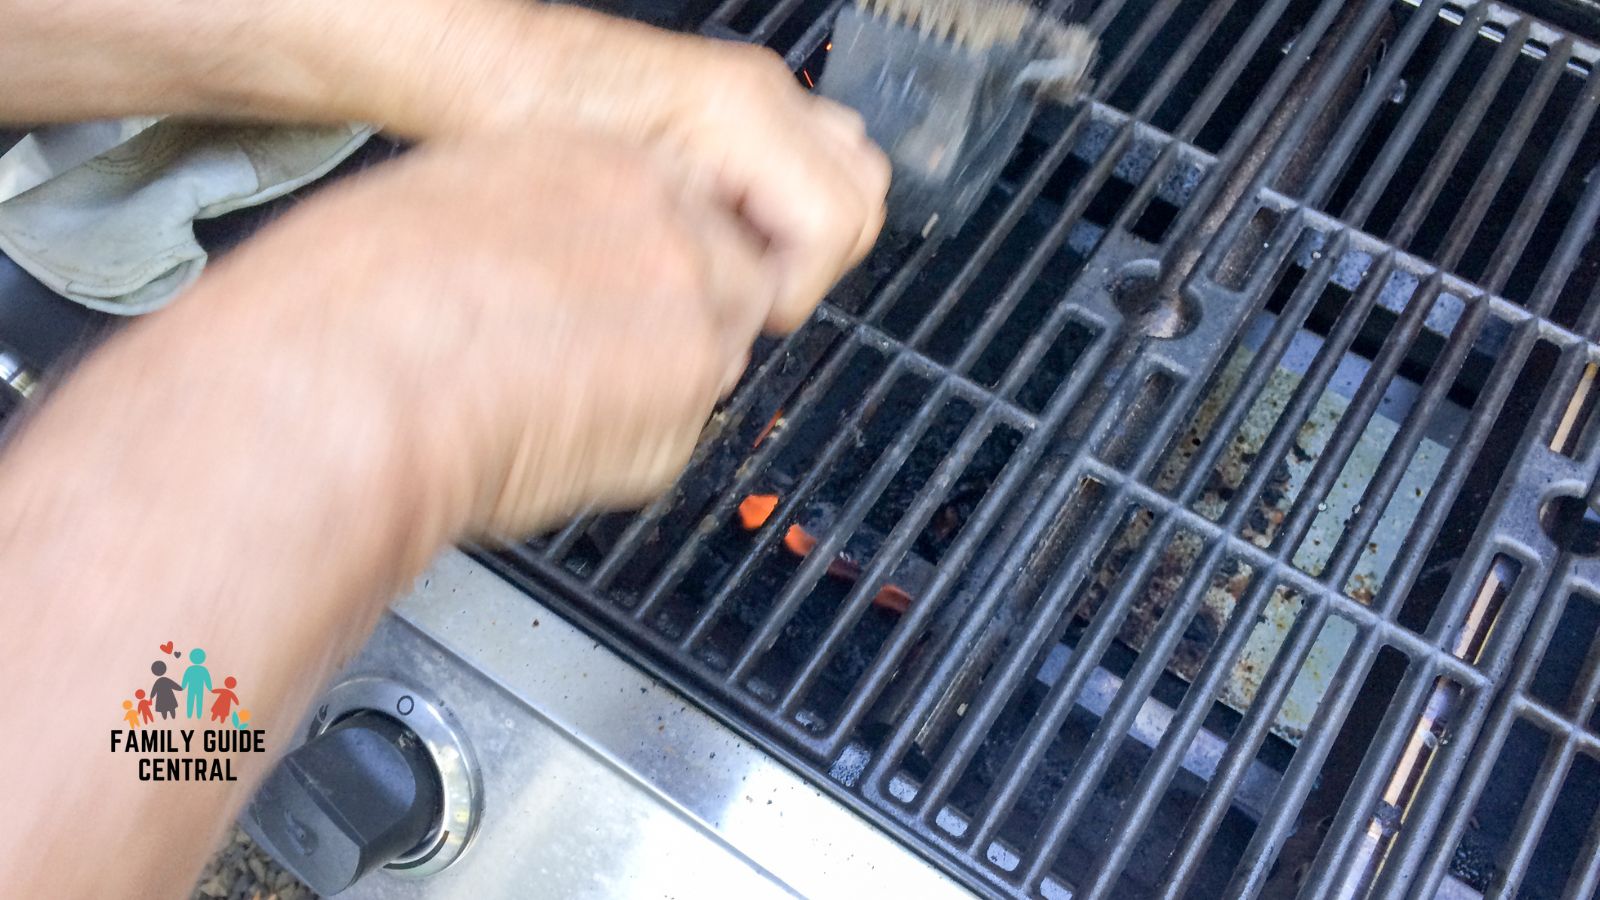
However, you can clean grill grates while they’re still hot if you take the proper precautions.
Heat up the grill for 10–15 minutes to burn away any leftover food particles. Then, you can turn off the grill and let it cool down a bit before scraping food debris off the warm grates with a grill brush.
You can also scrub your grates right after cooking while they’re still super hot. However, you’ll be limited in what tools you can use.
If you’re using a wire brush, brushing your grill works best when it is heated up. This will loosen up the food and make it easier for you to clean the grates. If you’re using a nylon brush, brush the grill when it’s cool.
It is best to clean the grill grates after they have cooled to a safe temperature. Ideally, wait until the grates are still warm but no longer hot to the touch.
This allows for easier handling and reduces the risk of burns. However, always exercise caution and use appropriate protective gear, such as heat-resistant gloves, when cleaning any part of the grill.
Cleaning the grill grates when they are cool or warm also provides better cleaning results.
Food residues and debris tend to be easier to remove when they have had a chance to cool and solidify. Use a grill brush or other appropriate cleaning tools to scrub the grates, removing any stuck-on food particles or residue.
Other interesting articles: