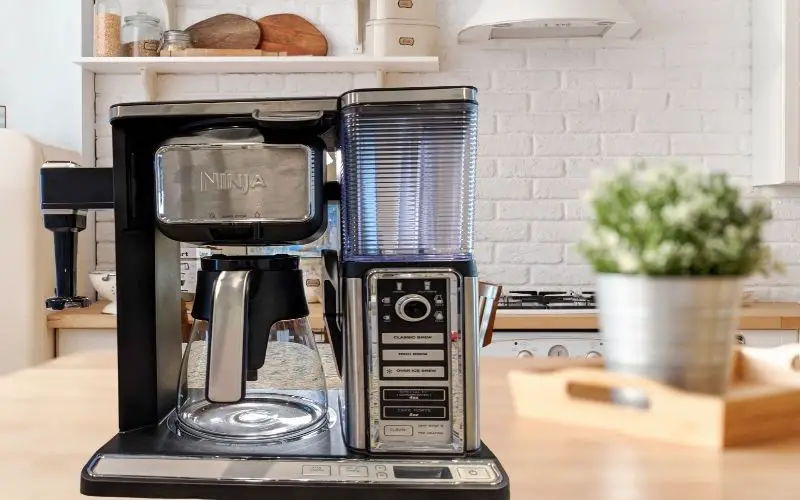
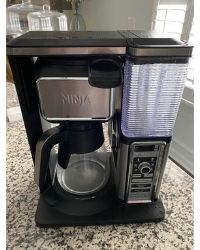
Why Ninja Coffee Makers Leak and How to Fix It
It’s never a good day when your favorite coffee maker starts leaking. It’s even worse when it happens in the middle of the night and you have to clean up a mess in the morning.
I know this because I experienced it firsthand with my Ninja coffee maker. Lucky for me, I found out what was causing that leak and how to fix it by venturing out and researching the answer on my own!
In this blog post, we’ll discuss why your ninja coffee maker might be leaking in the first place as well as some maintenance tips that will help keep you from having any more leaks in the future!
Why does the Ninja coffee maker leak?
The Ninja coffee maker can leak for a few reasons, often related to issues with the water reservoir. If the water reservoir isn’t properly connected or aligned with the brewing system, this can lead to leaks as water escapes from areas other than the intended flow path. Ensuring that the connection is secure should be the first check. Overfilling the reservoir beyond its capacity can also cause water to spill out, as the coffee maker isn’t designed to contain more than its maximum limit. In addition to these problems, wear and tear can lead to the deterioration of parts, such as gaskets.
Gaskets seal the connections between various parts of the coffee maker, and over time, they can degrade and lose their elasticity, failing to provide a tight seal. Replacement of a worn gasket is usually a simple and effective solution. When leaks occur, it’s also worth checking for any blockages or build-up of coffee grounds that may divert the flow of water to unwanted areas, leading to leakage.
Regular cleaning and maintenance can prevent such issues, helping to ensure that the coffee maker functions properly and remains leak-free.
How to diagnose the leakage
1. Initial Assessment
- Step 1: Begin with a visual inspection to understand where the leak might be originating. Look for wet and dry areas, as differential drying can indicate the source of the leak.
- Step 2: Examine the exterior of the coffee maker for any visible signs of damage, like cracks or deformations, that could directly lead to leakage.
2. Gasket Inspection
- Step 3: Locate the gasket, which is the rubber o-ring between the reservoir valve opening and the coffee maker valve.
- Step 4: Carefully inspect the gasket for any tears, uneven wear, or dry areas that would compromise its ability to seal.
- Step 5: If damage is found, replace the gasket. Ensure you purchase the correct size and type for your model.
3. Reservoir Check
- Step 6: Remove the reservoir and thoroughly dry the area around its base and where it connects to the coffee maker using a towel.
- Step 7: Reinstall the reservoir. Leave the machine unused for a few hours, then check for any signs of leaking or puddling.
- Step 8: Focus on the connection between the reservoir and the base valve. Clean out any debris or coffee grounds and verify that the connection is tight and dry.
4. Filter Maintenance
- Step 9: Refer to your Ninja coffee maker manual to locate the filter. If it’s time for a clean, or if you suspect a blockage, proceed to clean it.
- Step 10: Set a regular reminder (every three months) to clean the filter to prevent future leaks and maintain optimal brewing performance.
5. Tubes and Connectors Evaluation
- Step 11: Inspect the tube that runs from the reservoir to the coffee maker base for any disconnect, wear, or damage.
- Step 12: Check for loose connections or damage (cracks, holes) in this tube. Misaligned or damaged tubes can lead to leaks at the base of the machine.
- Step 13: If damage is found, attempt to tighten the connections yourself or replace the tube. For replacements, ensure the new tube matches the dimensions and material type of the original.
6. Testing and Observation
- Step 14: After making adjustments or repairs, run a water-only brewing cycle to monitor the machine for any signs of leaking.
- Step 15: Observe carefully throughout the cycle and after completion for any water accumulation or droplets in the previously identified troubled areas.
7. Follow-up and Professional Consultation
- Step 16: If the leakage persists even after your intervention, consider reaching out to Ninja customer support for further guidance or professional repair.
How to clean the Ninja Coffee maker with water and vinegar solution
1. Preparation
Preparing your coffee maker for vinegar cleaning is a step you can’t afford to skip. First, ensure your Ninja coffee maker is unplugged and cooled down before you start. Next, remove any leftover coffee grounds or capsules from the machine. Completely empty the water reservoir and make sure the coffee pot is empty as well. A word to the wise, always use a clean, damp cloth to wipe down the exterior of the machine before you start the cleaning process. This helps maintain the appearance of the machine and removes any grime or coffee residue.
2. Make the Vinegar Cleaning Solution
To perform a full clean on your Ninja coffee maker, you’ll need a vinegar-based cleaning solution. Create a mixture in a 1:1 ratio of water and vinegar. The ideal quantity is roughly half a gallon, although less may still work. Using vinegar is a natural, safe, and effective way to dissolve mineral deposits, oils, and other residues that can accumulate in your coffee maker over time.
3. Run the Vinegar Solution Through the Coffee Maker
Pour your vinegar solution into the reservoir. Before you start the brew cycle, remember to remove the filter. This allows the cleaning solution to pass uninhibited through all sections of the machine. Start the brew cycle on the highest volume setting. Always place a cup or bowl on the other side to catch the solution that passed through.
4. Cycle Through Your Vinegar Solution
Repeat the brew cycle with the vinegar solution multiple times. This ensures that the solution cleans all corners of your coffee maker. After each brew cycle, empty the cup into the sink. Although you may have made a large amount of cleaning solution initially, you don’t have to use it all. Six cycles should be sufficient to thoroughly clean your machine.
5. Run Clean Water Cycles
After you’ve finished with the vinegar solution, it’s essential to rinse out the vinegar residue that might still linger in the machine. Clean the reservoir again and then fill it with fresh water. Run multiple brew cycles with just water to flush out any remaining vinegar. The residual vinegar smell and taste can affect future brews if not properly rinsed out.
6. Reinstall Your Filter and Test Your Coffee Maker
After cleaning your coffee maker and running the rinsing cycles, don’t forget to reinstall your cleaned or new filter. This is critical to ensuring your coffee tastes as it should for each brew. Now, run a normal brewing process with coffee grounds. This will serve as a test run to verify that the deep cleaning has been successful and there are no lingering tastes of vinegar in your coffee.
This routine deep clean is recommended at least every three months to maintain optimal performance from your Ninja coffee maker. Consistent cleaning can significantly extend the life of your coffee maker and consistently brew delicious coffee.
Tips and Advice on how to avoid leaking of your Ninja coffee maker
- Regular Cleaning and Maintenance: To avoid leakage in your Ninja coffee maker, regular cleaning and maintenance are crucial. Gunk, such as coffee residue and mineral deposits from water (calcification), can accumulate within the machine’s chambers, leading to blockages. When water pathways are obstructed, it can force water to spill out elsewhere, causing leaks. Implement a routine cleaning schedule that includes unclogging and wiping down accessible areas. For those hard-to-reach spots, consider using a soft bristle toothbrush to gently scrub away buildup. Additionally, running a water and vinegar cycle can effectively clean the system, ensuring your coffee maker runs smoothly, remains sanitary, and continues to produce great-tasting coffee.
- Cleaning or Replacing the Filter: The filter in your Ninja coffee maker plays a critical role by separating grounds from the coffee during brewing. Over time, this filter can become clogged with particles and calcium deposits, hindering water flow and potentially causing leakage. Ensure the filter is cleaned or replaced every 3 months to maintain optimal performance. Set reminders for yourself as you would for other routine maintenance tasks, like changing an air filter, to ensure this task isn’t overlooked. A clean filter facilitates smooth water flow and prevents overflow and leakage.
- Descaling the Machine: Utilizing a descaling solution is highly recommended for removing mineral deposits that accumulate in your Ninja coffee maker. These deposits can create blockages within the water flow system, leading to potential leaks. Descaling solutions are specially formulated to dissolve these deposits, ensuring your coffee maker functions efficiently. While commercial descaling solutions are effective, a natural descaling solution of water and vinegar can also be used to achieve similar results. This preventive measure helps prolong the lifespan of your coffee maker and ensures it continues to operate without issues.
- Avoid Overfilling the Reservoir: It’s essential to adhere to the water level recommendations indicated on the reservoir of your Ninja coffee maker. Overfilling beyond this mark can lead to water overflow, which not only causes leakage but also can damage the coffee maker’s electrical components over time. Always pour water slowly and pay close attention to the indicated maximum fill line to avoid this common issue.
- Understanding Potential Leak Sources: Being proactive about understanding why leaks occur can empower you to prevent them. Knowledge of the coffee maker’s structure, potential wear and tear spots, and common issues like clogs or overfills can provide you with the insights needed to maintain the machine properly. Recognizing the early signs of problems, such as unexpected water spots or slower brew times, can lead to quicker interventions and prevent more significant issues down the line.
- Value Regular Maintenance: The overarching theme in preventing leakage and ensuring the longevity of your Ninja coffee maker is consistent and thorough maintenance. By valuing and prioritizing regular cleaning, filter maintenance, descaling, and careful use, you maximize the machine’s lifespan and ensure it continues to produce high-quality coffee. Treating maintenance as an investment in your coffee maker’s longevity ensures you get the best value out of your machine over time.
Related interesting articles: