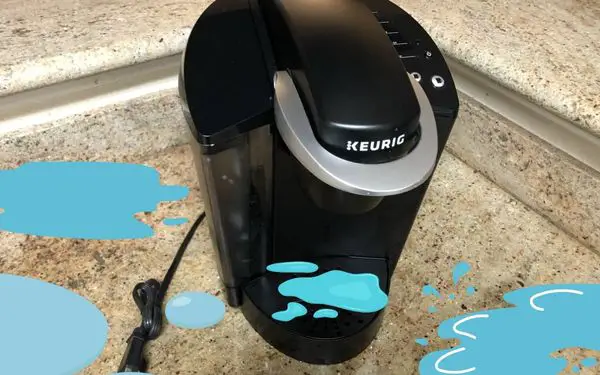
Why Is My Keurig Leaking? (ALL possible solutions!)
You’re sitting in your kitchen, enjoying a cup of coffee, when suddenly you notice that water is leaking from the bottom of your Keurig. What do you do?
Well, first things first: don’t panic. There are a few things that could be causing this problem, and most of them are fairly easy to fix!
Why is my Keurig leaking?
The water reservoir seal is old or damaged
There’s a small nozzle on your water tank that attaches to the back of your Keurig. It’s the opening that allows water to pass into your Keurig the minute you press the brew button.
There’s usually a gasket here, a rubber seal that helps the value secure the connection so that water doesn’t escape in the between.
If this gasket is worn out or damaged, you may have to find a new one to replace it with.
Fortunately, there are many gaskets that exist outside of the company’s offers and if you can measure the size and thickness of that Keurig’s gasket, you can find a replacement online.
The O-ring between the reservoir tank to the Keurig needs to be replaced
Take your water tank out. Check the area that connects to the Keurig. You’ll find a nub at the bottom. You’ll find an old O-ring at the bottom of the nozzle.
If it’s worn out, it might cause your Keurig to leak and you’ll need to replace that so that water can’t escape.
The O-ring acts as a seal to help prevent water from leaking from the nozzle that attaches to the Keurig.
The reservoir tank has a crack in it
The first thing you need to do is figure out whether or not it’s just a simple fix, or if you’ll have to replace your entire unit.
If it’s just a simple fix, then there are a few different things that could be causing the leakage.
The most common reason for Keurig leaking is that the reservoir tank has a crack in it.
This happens because of repeated use and wear and tear over time.
The crack can be repaired with glue or tape, but if it gets worse, then you need to buy a new one or replace the entire unit.
It is highly recommended to replace the tank unit if you have resources to avoid any kind of frustration that may come with Keurig leaking from the bottom.
You might be overfilling your water tank
If you have a Keurig that doesn’t have a removable water tank, it may be harder to judge how much water to fill.
It’s easy to overfill the reservoir and cause your brewer to leak.
Overfilling your water tank can cause your brewer to leak at the top or at the bottom.
Some Keurigs have a lock on them that prevents them from leaking if you overfill them, but some don’t, so it’s important to follow manufacturer instructions for filling your reservoir with water.
Ensure not to overfill the water tank as it may cause several damages.
Use the manufacturer’s manual guide for instructions on filling the Keurig water reservoir to avoid any kind of leakage and spilling.
The Keurig K-pod cover is not fully shut
Check that your Keurig K-pod cover is fully closed.
If it’s not, water can leak out of the machine, which can damage your furniture and/or the machine itself.
To fix this problem, all you have to do is close the Keurig K-pod cover completely!
In some common cases, the reason why the cover will not be fully closed is that the user may be using a non-approved coffee pod alternative such as a reusable one or one that looks like it fits but doesn’t.
These different-size pods can protrude and make it much more difficult to close your K-pod lid.
The plastic tubing system inside your Keurig has detached
The plastic tubing system inside your Keurig has detached, and that could be causing the leakage.
Or there might be a crack in the tubing system that has detached, causing leaking.
If you experience plastic tubing system detachment inside your Keurig brewer please schedule a service appointment with Keurig to get that repaired.
The detachment of the plastic tubing system may be due to a variety of reasons, including misuse, clogging, or a defective part.
The leak may come from another part of the brewer as well, such as the spout or lid area where hot water comes out when brewing coffee.
If you experience leakage from inside your Keurig machine please seek help.
If you are brave enough to try opening up your machine yourself, then you might be able to find the loose tube and reattach it yourself.
You are using a generic coffee pod that doesn’t fit the Keurig well
You’re probably using a generic coffee pod that doesn’t fit the machine well. If your generic coffee pod doesn’t fit well, this may be the cause of a water leak at the top of the machine.
The refillable capsule may be too large and won’t fit right inside the pod holder, causing a water leak. So the lid or cover can’t close properly.
Third-party coffee pods may also have film lids that are too thick to be penetrated by puncture needles, resulting in water leakage.
The Keurig coffee machine requires specific types of coffee pods.
Also, if you don’t use the correct pod, your coffee might not taste as good.
Using a hack could damage your Keurig and void its warranty if it causes damage to your Keurig.
You can buy many K-cup pods for the price of a new Keurig so avoid using hacks until you have nothing left to lose.
One of the upper gaskets is old and worn out
One of our customers recently wrote us asking why their Keurig was leaking water, so we decided to investigate and see what was going on.
We found out that one of the upper gaskets was old and worn out, which caused the leak problem.
To stop water from leaking out of the Keurig brewer due to a loose or broken upper gasket, replace the gasket.
Another thing, you’ll also want to detach the reservoir and pry off the O-ring with help of a plastic opening tool.
Replace the old O-ring with a new one too if it’s worn out (you can buy a new upper gasket and O-ring from the local retainable seller or from Amazon).
Then reattach the reservoir tank and monitor it to see if any water continues to leak.
The water heating tank inside the Keurig is cracked
First, check to see if the water heating tank inside your Keurig is cracked.
This is rare, but it does happen sometimes, especially if you’ve had your Keurig for a long time.
It’s not an easy fix, and it’s highly recommended that you replace the entire unit if you have the resources to do so.
You’ll notice that the leaking occurs while the water is being heated.
The only way to really tell if this is what’s causing your leak is by taking apart your Keurig and checking out its heating tank.
Your own coffee cup might have a crack in it
Sometimes the problem is as simple as a cracked cup. If your coffee cup has a crack in it, the coffee will leak through the crack and onto your countertop.
Any water going through those cracks will leak out onto whatever surface it’s sitting on.
That means if you’re using a cracked mug in your Keurig, then you’ll see leaks wherever it’s placed.
Replace the cup.
How to diagnose a leaking Keurig
Your Keurig is leaking at the bottom
You first need to figure out where the Keurig is leaking from to be able to start to figure out what the problem might be.
You should look at the Keurig and see if the leak is coming from the bottom of the machine and if you can, figure out what part of the bottom is leaking.
Your Keurig is leaking from the top
A Keurig can also leak from the top. It may leak from the top of the water tank, the top of the k cup holder, and more.
A Keurig is something that has plenty of places it can leak from, and the top is one of them.
Your Keurig is leaking before you start brewing
You also need to figure out the timing of the leak.
Is the Keurig leaking while it is turned off, while the machine is not working and while it is fully idle, or does it wait to start leaking until the machine starts working?
Your Keurig is leaking during preheating
Your Keurig may also be leaking while it is preheating. When the machine is preheating it is under pressure.
The water is being moved from the tank to the inside of the machine. This means that the leak can be nearly anywhere.
Your Keurig is leaking while brewing
The last time that can cause a leak is when the machine is brewing.
If your machine is leaking while it is brewing, the issue is likely with the k cup holder or the hoses that lead to it.
How do I fix a leaking Keurig?
Don’t overfill your water tank
The first issue that often causes leaking is the tank being too full.
You do not want to fill the tank over the max fill line because that is the line at which the manufacturer decided that the machine is going to work well.
They have determined how much water can be added to the reservoir without affecting the function of the machine negatively.
Make sure to descale your Keurig regularly to avoid clogging up the system
A dirty machine may also be the issue.
If you are using a machine that has a ton of limescale build it can cause your machine to clog up, it can cause the machine to become bogged down, and it may make the water come back out and spurt.
To handle this issue, you do need to make sure you descale your Keurig every so often.
You can do this by cleaning the water tank, running vinegar and water through it, and you can even buy Keurig cleaner cups that you can use to help take the limescale out of your machine.
Use Keurig brand K-Cups that properly fit your Keurig
Another problem you might be dealing with is a Keurig cup that is not fitting properly.
You need to be using K cup brand cups to ensure that they fit well and that they are not going to have any issue.
You can find some off-brand or other brand cups that might fit, but to be certain that it is always going to fit, you do want to use only the Keurig brand.
Make sure to replace the O-ring on your water tank reservoir
Your O-ring on the water tank might also be dislodged or damaged.
The O-ring on the reservoir helps to ensure that the water does not leak out of the tank when it is not in use as well as when the water tank is being used.
You want to make sure that the ring is new enough, that it is not damaged, and that it is also clean and fit well.
You can change the o ring yourself or you can get a technician to help you.
The O-ring is located at the bottom of the reservoir and is what keeps the water from leaving the tank unless the machine is in use.
Be careful when transporting your Keurig and avoid dropping it
If you are moving your Keurig, there may not be a leak, it may just be that you are spilling water.
If you drop a Keurig, odds are you are going to be dealing with issues like cracks and damage to the machine itself.
When you do move your Keurig or move it around from place to place, you do need to be careful and ensure that you are not going to drop it and that it is protected.
You want to be very careful so that you can be certain you are not going to cause damage to the machine itself.
Open up your Keurig and reattach any water tubing line that is loose
Another problem you might be seeing is that the water tube from the reservoir is not connected.
You need to make sure this tubing is connected properly to ensure that the water is not going to be spurting out or coming out when it should not be.
Repair or replace the water tank if it is damaged or cracked
If you have a water tank that is damaged you do need to get a new tank. You cannot keep using a cracked tank as the crack will allow water to get out of the crack.
A cracked tank is never going to work properly and it is never going to work well again.
You can order a new tank online or you can contact Keurig customer service to get the right tank for your machine and for the particular model that you have at home.
Use a new coffee cup if it has been damaged or has a crack in it
If you have a coffee cup that is damaged, this might also be the problem that you are dealing with.
You do need to be very careful with a coffee cup that is damaged as it can burst and break worse when exposed to very hot liquid can cause injury to you.
What are some tips for preventing leaks in my Keurig?
Preventing leaks in your Keurig is the key to ensuring you have a good experience with your machine.
Here are some tips for keeping your Keurig leak-free:
- Avoid clogging. If you’re using too much coffee or trying to use ground coffee instead of a pod, it can clog up the filter and cause leaks in your machine. If this happens, run two cups of vinegar through the machine to clear it out.
- Avoid overfilling. Make sure you’re not putting too much water in the tank at once. It can cause leaks if you fill it all the way up!
- Avoid wrong-size coffee pods. Make sure you’re using a pod that fits your machine correctly so that it doesn’t fall over and cause a mess when brewing! (We recommend using our brand: [company name])
- Need to move your Keurig? Moving your Keurig can be tricky! Make sure you’re moving it carefully. try covering it up with a towel for protection in case it bumps and bangs into things.
- Keep an eye on the gasket as you remove your water tank from time. Check to see its condition regularly and replace it when necessary.
What should I do if my Keurig is still leaking after following these tips?
If you exhausted all your possible fixes in this article then it may be time to call it in for service.
You can reach out to Keurig customer support on their website, or you can even live chat with them during their working hours.
Other interesting articles: